If your Ring Video Doorbell Pro is no longer working as intended and you’ve exhausted all troubleshooting options, or if you intend to sell or give it away, you can reset it to its factory default settings. This guide will walk you through the steps.
Resetting a Ring Doorbell is necessary if:
- The device is unable to connect to your wireless network.
- You’ve upgraded your Wi-Fi router and need to reconfigure your network settings
- There was a power outage, and the Ring doorbell did not reconnect.
- You’re relocating.
- You’re selling your Ring doorbell.
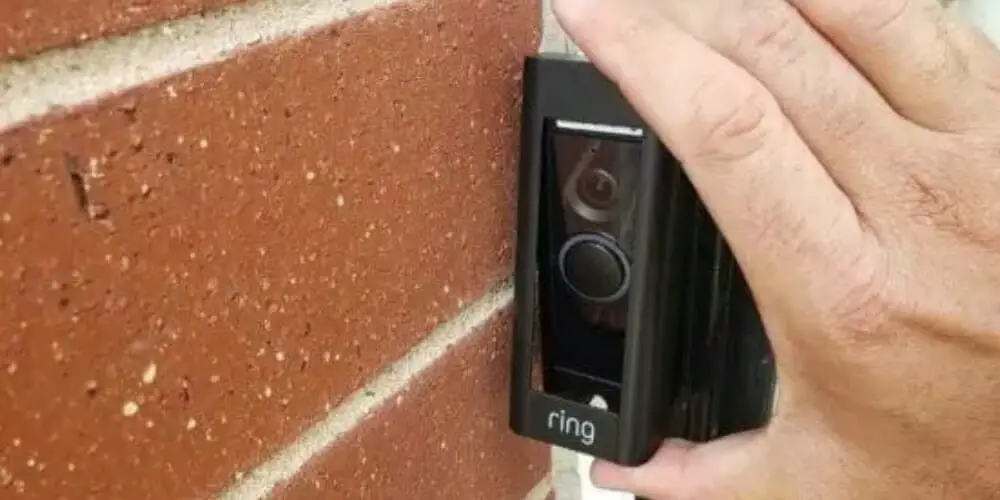
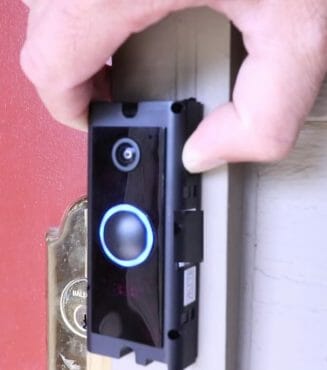
Step 1: Undo the Security Screw to Remove the Faceplate
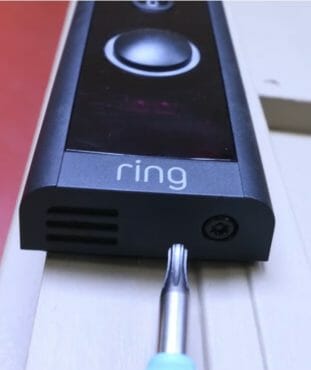
Changing your faceplate on a Ring doorbell Pro is a breeze. All you’ll need to do is first undo the bottom screw, then take the cover straight off.
It might be stuck because there could be grime and gunk and sand and all kinds of dirt. Remove the faceplate from the doorbell, then press & hold the reset button on the right side of the camera for 15 seconds. And then put it back on & tighten it.
Step 2: Find the Setup Button on the Right Side of the Doorbell
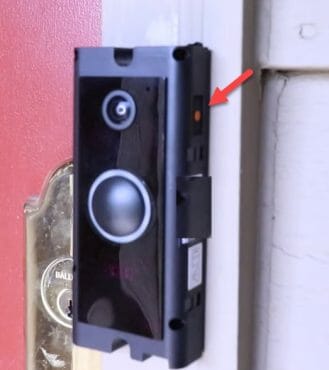
When getting started with your Ring Video Doorbell, make sure you have an active internet connection. Tap the “Continue” button in the Ring app when the orange light on your doorbell is blinking white.
The Ring wifi network is a temporary access point that you can join during the Ring device setup process.
To get your Ring Doorbell to reset, hold down the orange button for 20 seconds. When you let go, the front light will blink a few times. Next, remove the battery pack from its compartment by using your fingernail to pry it out. Firmly press and then release the orange button on the back.
Step 3: Hold Down the Setup Button for 15 Seconds
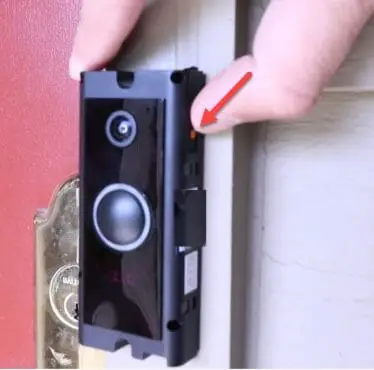
To configure your Ring Video Doorbell first-generation, press and release the orange setup button on the back of the doorbell. From there, you will be prompted to enter Setup Mode.
If the spinning light on the front of your Ring Video Doorbell is blinking, it means you’re in setup mode. When set up, any Ring product creates a temporary network called “Ring Wifi.”
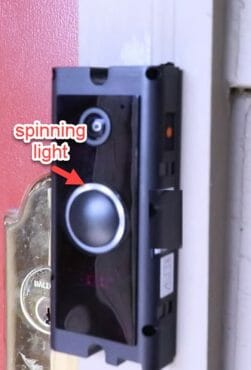
Step 4: Once the Reset is Complete the Doorbell will Enter Setup Mode
What is Setup Mode?
The Ring will respond that it’s in setup mode and to access its settings in the app.
When you enter setup mode, any Ring product will generate a temporary wifi network. The app will connect to this network during the account setup to help teach your Ring products how to connect to your home wifi network. (1)
When you set up your Ring product using the Ring app, it will automatically switch over to your home network.
That’s it! You are done!
See below for some more tips to continue with the setup or do a hard reset.
Performing a Hard Reset
In case the light on your Video Doorbell Pro doesn’t turn on and off, please try the hard reset.
To carry out a hard reset. Hold the right button down for 30 seconds.
Allow about one minute for this procedure to complete, then try putting it in setup mode again by momentarily pressing and releasing the right button.
Ring Doorbells contain a light that will blink after you release it to indicate that it is resuming. This process can take approximately a minute and they’ll return to their normal state.
How to Reset An Amazon Ring Video Doorbell
Resetting your Amazon Ring Video Doorbell before reconfiguring it using the Ring app on your smartphone will help you get up and running quickly. Before proceeding with this guide, please download and install the app first.
- On your phone, open the Ring app.
- Sign in to your account.
- Choose Set Up a Device.
- Scan your Ring Video Doorbell’s QR code with your phone’s camera. It’s on the back of your doorbell or in the product packing. (2)
- Choose your location.
- Set a name for your Ring.
Check in front of your Ring Doorbell for the small black button. Press and release it. When you see a spinning light, tap Continue on your Ring app & connect to the “Ring” network. Connect to your network using Wi-Fi or Ethernet cable
Why Reset a Ring Doorbell
When it comes to Ring Video Doorbells, you may need to factory reset or reprogram your device (which is easy) or you may also be experiencing issues that might only be solved by performing a hard reset.
If you’re looking to reset your Ring Doorbell, this article have you covered. We go over the steps of wiping it clean before giving it to someone else or selling it. Just remember that any new owner of a used Ring needs to be able to reset their device before safely using it.
Bonus Tips: Removing the Device
Step 1. Tap the gear icon for your Video Doorbell from the home screen
Tap the gear icon in the top right. You may change modes, devices, and notifications, and also activate/disable alerts or motion recording.
Step 2: Tap Device Settings
Tap device settings. The Chime device is here for you to add to your list. You can easily get started by adding devices that are not yet on the list.
To update your account, all you have to do is click this button and you’ll find everything you need. Here, it’s easy to change the master account’s name and phone number. But security is always important so make sure to check how you’ve configured two-factor authentication on your various devices. (3)
Step 3: Tap General Settings
Settings: Toggle between the General and Location settings by tapping here.
- You can alter the name, address, and Ring Alarm Monitoring version of your location under General Settings.
- You may change the mode, Alarm Alerts, Users, and Neighbors settings in Location Settings. This screen also allows you to delete the Location.
- Sensor chirps, Entry/Exit delays, and which components are monitored are all options in the mode settings. For additional information on Entry and Exit Delays, go here.
- You can control who has access to your devices and how much control they have over your system from the User’s screen.
- You may change your alert and post selections in your Neighbor’s settings.
Whether you’re just starting with the Ring family of products or if you’re a longtime customer, we hope that you can take some time to explore your Ring command center. In this area, you can manage all of your devices and make use of some great features.
With the Ring app, you have control over your home’s security – whether it’s on your phone, tablet, or computer.
Step 4: Tap Remove this Device
Ownership of the Ring app or plan will not be terminated on devices it has been deleted off of. If the Ring app has been uninstalled, but you still want to remove your device, you can reinstall it, log in with your old email & password and then do the following:
- On the top left, tap the three lines.
- Devices with a Tap
- Remove the gadget that has to be removed by tapping it.
- Select Device Settings.
- Go to General Settings and select it.
- Remove This Device by tapping it.
You can also use this method to replace or trash any Ring doorbells or security cameras that you may have.
What generations does this article apply to
This article applied to the Ring Video Doorbell Wired, Ring Video Doorbell 1st Gen, Ring Video Doorbell 2, Ring Video Doorbell 3, Ring Video Doorbell 4, Ring Video Doorbell Pro, Ring Video Doorbell Pro 2, and Ring Video Doorbell 3 Plus types and generations.
References
(1) wifi network – https://www.verizon.com/info/definitions/wifi/
(2) QR code – https://blog.hubspot.com/blog/tabid/6307/bid/29449/how-to-create-a-qr-code-in-4-quick-steps.aspx
(3) two-factor authentication – https://authy.com/what-is-2fa/
Video Reference
One Hour Smart Home