For most people building a home, security is the number one concern. People want their homes to make them feel safe and secure to tend to their life without worries of any threats. For this reason, the quality of the materials and pieces used to build a house must be top-notch, so it can provide adequate security and last a good amount of time.
There are two options for a door security bar: Do It Yourself (DIY) or buy. Locks on doors and windows are the primary way houses are kept safe from intruders. Although locks can be quite safe depending on the quality, a sturdy security bar’s additional security is absolutely worth having. A Door Security bar is a strong plank of wood (or metal) mounted on doors. A Door Security bar primarily protects against forced entry due to its strength and sturdiness.
Below will be going through some steps to create your own in case you would rather not purchase one.
Materials Needed
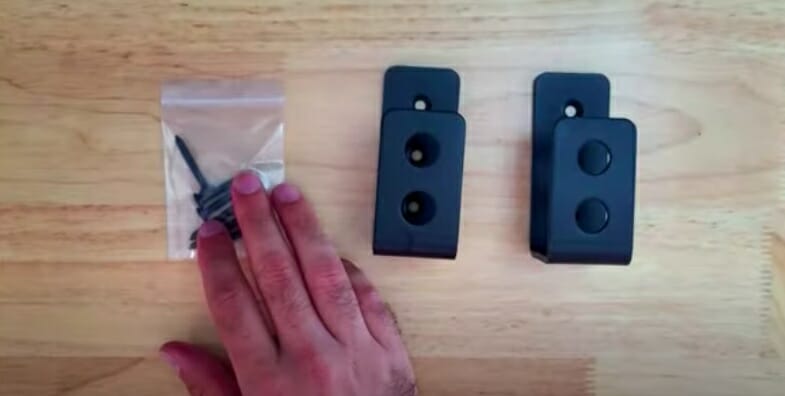
There are two primary types of door security bars. Ones that are made of wood and ones that are made of steel. Both types are used for the same purpose and can provide adequate security. However, there are different things you’ll have to take into consideration if you’re building a Door Security Bar yourself. The two types also have different finishing times. Here are the main materials needed to DIY a Door Security Bar.
- A plank of wood or a steel bar
- A pencil
- Robust wood screws
- Blankets
- A drilling machine
- A saw
- A ruler or a measuring tape
With these materials, a strong and secure Door Security Bar can be made by following the steps described below.
1. Measure
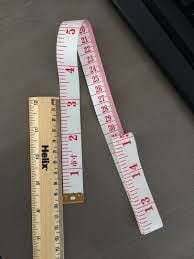
To do the job properly, everything must be measured exactly. In this step, you must decide roughly where the brackets will go. Put the plank of wood or bar of steel across the width of the door and see how long the plank or the bar needs to be. At least 3 inches of extra length will be needed on each side.
Hence the plank of wood or the steel rod must be cut at least 6 inches longer than the width of the door. To save time, it is a good idea to get good measurements before cutting so that the plank of wood or steel rod does not need to be cut multiple times. You will need the saw in this step. (1)
2. Marking
In this step, the location of the brackets and points to drill holes at are decided. Place the plank of wood or the bar of steel next to the width of the door (the ends should be touching the wall on each side of the door) and use a pencil to mark where the brackets should go.

You may also place the brackets on both ends of the plank of wood or the steel rod and then mark their locations if that increases their placement accuracy.
Lastly, place the brackets at their marked location one by one without the plank and mark where holes need to be drilled. For the holes to be accurately positioned, shade the entire area of the screw holes of the brackets on the wall. Accurate holes may increase the hold of the brackets, increasing the sturdiness of the Door Security Bar.
3. Drill

In this step, you will use an electric drill to drill holes at the location marked. One of the things to consider before starting to drill is the size of the drill bit. Make sure that the drill bit (the needle of the drill) is of adequate size for the screws that will go in the brackets. These holes will be smaller if the screws are to go in wood than for concrete or stucco.

Once the appropriately sized holes have been drilled, anchors need to be inserted. However, the anchors are only needed for concrete walls and stucco and not for holes in wood. (2)
4. Install Brackets

Once holes have been drilled at the proper locations and anchors have been installed, it’s time to install the brackets. Just place the brackets at the marked locations and use a screwdriver to screw them into the wall. Make sure you use heavy-duty screws and screw them in. Tightly screwed brackets are crucial to the sturdiness of the Door Security Bar.
5. Mount
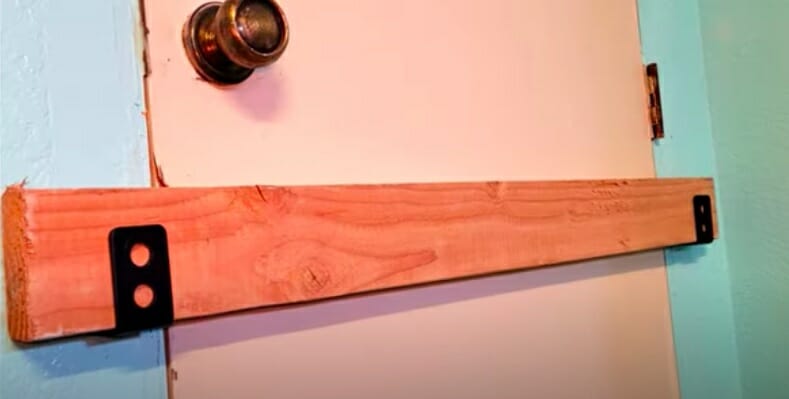
Once the brackets are installed, the Door Security Bar is ready to go. Mount the plank of wood or the steel bar on the installed brackets, and you have the added protection of the Door Security Bar against any forced entries. You may also give the bar a good jerk to ensure the brackets are screwed tightly and tighten the screws if there are any inadequacies.
6. Test

Finally, you may also test if the door security bar works. Just go outside and try to barge in. It is working if you can feel how hard it is to move the door. You may also test the strength of the Door Security bar alone by keeping the door unlocked and only allowing the bar to keep the door closed.
You may place a card between the door’s crack where the door lock locks to ensure it doesn’t lock and then try to barge in. This time you may use way more force and be more vigorous in trying to break in without fearing you may break the lock.
To Buy or To Build? (Advantages & Disadvantages)

You may alternatively choose to buy a Door Security Bar. Both of these options are great. A bought Door Security Bar will keep the house secure as well as a built one. But before you decide, you may want to consider all the pros and cons of buying a Door Security Bar vs. building one yourself.
Buying a Door Security Bar
Advantages
- If you buy a ready-made security bar, you no longer have to exert as much effort in building one.
- You may find Door Security Bars with good designs that you may be unable to build yourself.
Disadvantages
- Buying a Door Security Bar will cost significantly more than building one.
- The size of a bought security bar might not fit a particular door. They come in different sizes, but there is no guarantee that they will be a perfect fit.
- Some ready-made Door Security Bars in the market are not as sturdy as they need to be. They are made of cheap material and are not as strong as the ones you may build yourself. Some ready-made Door Security Bars have a faulty mechanism that does not work properly.
- Some effort will still be required to install the Door Security Bar.
Building a Door Security Bar
Advantages
- Building a Door Security Bar allows you to choose the materials and customize the sizes yourself. This way, the security bar will surely be made of the strong material you chose. A DIY Door Security Bar is also perfect for the door it is built for.
- Building a Door Security Bar yourself costs significantly less than buying a ready-made one.
- Building a Door Security Bar yourself may not require much more effort than buying a ready-made one and installing one.
- Once Door Security Bar is made, it gets easier to make Security Bars for other doors and windows, especially if other doors are the same size.
Disadvantages
- It takes a lot of time and effort to build and install a DIY Door Security Bar.
- You may not have a lot of design variations to choose from when building a Door Security Bar yourself as opposed to buying one from the market.
Whether you buy a Door Security Bar or build one yourself, the most important thing to consider is the materials’ quality. If spending a little more money or working a little harder can ensure the safety of your home, it’s worth it.
Final Word
Security against intruders is one of the primary concerns for people building a home. Although door locks provide basic security against unwanted entrances, adding extra security by using a Door Security Bar might be a good idea.
All you need to do to build a DIY Door Security Bar is cut the plank of wood or steel bar to the appropriate length, install the brackets, and mount the Door Security Bar. There are advantages and disadvantages to buying a Door Security Bar and building one yourself. Overall you can build a pretty high-quality door bar on your own.
References
(1) steel – https://www.thoughtco.com/steel-history-2340172
(2) wood – https://www.britannica.com/science/wood-plant-tissue
Video Reference
Urban Survivor