If you have a digital camera, using couplers is the easiest way to splice your cables. But you will need an RJ45 crimper to do this. If you don’t have an RJ45 crimper, you can splice each of the eight wires individually. Be careful while slicing the white wires and match them correctly. You can use male and female connectors for the RG59 cable if you have an analog camera.
Splicing wires can be done in a few ways: soldering them, twisting them, securing them with a crimp terminal, or using insulated connectors.
I will go into more detail below.
Getting Started
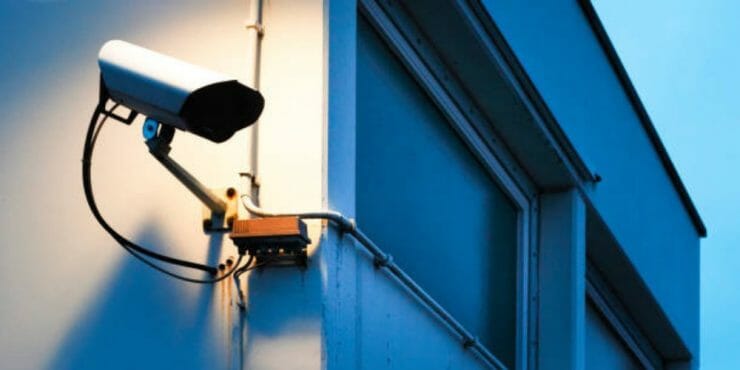
Cameras give the best picture quality when connected to the monitor or the PVR via a single continuous wire. Unfortunately, things don’t always work out perfectly.
Sometimes you need to lengthen your wire either because of an error in your measurements or because you need to move the camera or the PVR somewhere farther away.
To extend the wire, you will need to splice it, and how well you slice the wire will determine the quality of the footage you’ll get.
Types of Cables
How best to slice a camera cable depends on the type of cable your camera uses. In the following sections, I go through the different types of cable, how to identify each type of cable, the tools you’ll need to splice your security camera wire, and of course, how to splice each type of security camera wire.
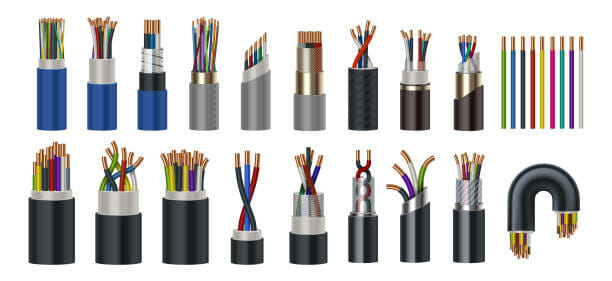
There are two basic types of security cameras: digital cameras and analog cameras. Digital cameras use Ethernet cables, whereas analog cameras use different variations of 3-wire (aka Siamese cable). (1, 2)
Ethernet Cable
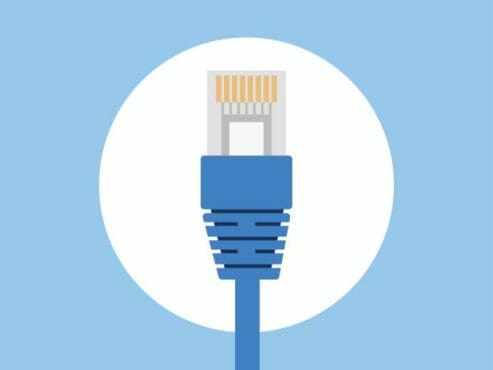
Digital security cameras (aka IP cameras because they use internet protocol) use Ethernet cables to send data to the PVR or the monitor. Some IP cameras are enabled with PoE and receive power through the same Ethernet cable. (3)
3-Wire
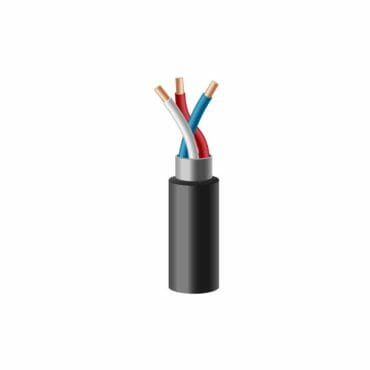
Analog cameras use RG59 cable to transfer data; the same cable is used to supply analog data to TVs. Three wires also have two additional wires that supply power to the camera. These wires are shielded, which allows them to be used for longer distances than an Ethernet cable. Analog cameras that allow audio need a variation of a 3-wire called a 3.1 cable with an additional wire to transmit audio signals.
Tools Needed
To splice an Ethernet cable, you will need the following tools.
- Wirecutter
- Electrical tape
- RJ45 connector
- Cable tester
- Wire stripper
To splice a 3-wire cable, you will need the following tools.
- Wirecutter
- Electrical tape
- Male connector and female connector for coaxial cable
- Cable tester
- Wire strippers
Splicing vs. Using Couplers
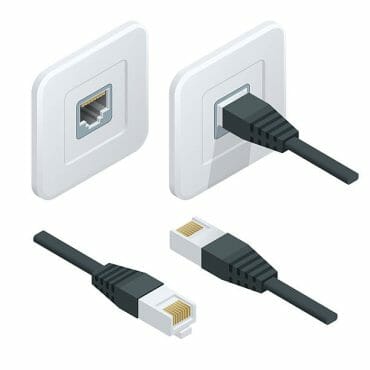
If you wish to splice an Ethernet cable, you also can use couplers instead of slicing. Using couplers is a much easier and faster solution compared to splicing for an Ethernet cable. But using a coupler is not always an available solution. It would be best if you had some extra things you may not find in your toolbox to use a coupler.
To use couplers, you need the following;
- RJ45 couplers (duh)
- RJ45 crimper
- RJ45 connectors
If your wires already have connectors on both sides, you don’t need the RJ45 crimper or RJ45 connectors. You may also skip the first step of the following steps.
If you have these things, all you need to do is;
- Use the RJ45 crimper to crimp RJ45 connectors to both ends of both cables. Keep the same colors (e.g., orange, blue, brown, and green). Make sure to pair each white wire with its colored wire.
- Plug one end of each wire on the RJ45 coupler.
- Use electrical tape to wrap the RJ45 coupler and secure the cables from detaching or rusting because of rainwater.
- Plug the remaining ends on the camera and the PVR.
For details of the first step, read the next section, which describes splicing wires when you don’t have an RJ45 crimper, coupler, and connectors.
Splicing the Ethernet Cable
An Ethernet Cable is a camera wire that doesn’t have a BNC connector. As mentioned above, certain steps are involved in installing a camera wire without a BNC converter. The same steps are also involved in splicing the ethernet cable.
An individual can slice an ethernet cable manually easily. here are some steps:
Measuring the Ethernet Cable
The first step towards slicing an ethernet cable is proper measurement. Measure the length of the cable precisely and mark it 2-3 inches longer than the intended size.
Removing the Harmed Parts
Afterward, cut the hazardous parts of that ethernet cable using any mechanical tool, such as pliers.
Removing the Outer Insulation
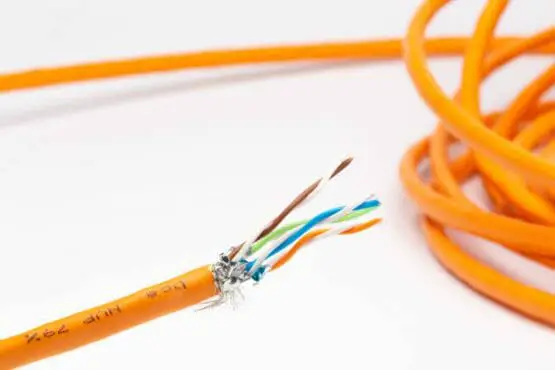
After removing the damaged parts of an ethernet cable, remove the outer insulation of the ethernet cable. The insulation removal frees a couple of inches of wire at the sides of every cable. Ensure the insulation is removed properly so the copper wire isn’t damaged. This step requires utmost care and precision.
Noticing the Inner Wires
Once you have removed the insulation properly, you can notice the inner wires. There are eight wires in an Ethernet cable, and they all are color-coded. The color codes include orange, blue, brown, green, white-orange, white blue, white brown, and white green.
Unwinding Braided Pairs
The next step of splicing an Ethernet cable to unwind the braided pairs. After unwinding, strip the outer parts of all eight color-coded wires.
Winding Braided Pairs
After stripping, wind the same colored copper wire in both Ethernet cables with each other. This step requires a lot of coordination. Ensure that each pair has a considerable distance from the other pairs.
Add Insulation Layer
In the final step of splicing an Ethernet cable, add an insulation layer over the spliced wires using electrical tape. Use a cable tester to ensure that your cables are working properly. Also, always use the proper camera equipment so that the process of splicing an Ethernet cable has effective results.
Your spliced Ethernet cable is ready!
Splicing a 3.1 or 4.1 Cable
Coax cables are normally divided into two categories. These categories include a 3.1 cable and a 4.1 cable. A 3.1 coax cable adds another wire to the three-wire cable to carry 2-way audio in cameras.
However, a 4.1 coax cable has more wires than a normal one. A 4.1 coax cable is used in the analog system.
The splicing process of a 3.1 and 4.1 cable has the following steps:
Stripping the Outer Insulation
In the 3.1 and 4.1 wires, there are multiple layers of insulation. The outer wire is in the form of a braid and acts as a shield. The inner wire has the task of transforming the signal. For the initial step of splicing a 3.1 or 4.1 wire, strip the outer woven braid insulation and pull it from the inner cable. Repeat the same step for the added wire.
Stripping the Inner Insulation
After stripping the outer insulation, strip away the inner insulation similarly. Repeat the same step for the added wire.
Connecting the Wires
Connect the centers of the added and original wires through soldering or crimping—wrap the tape around them to join them. Twist the braid and connect them through soldering or crimping through a butt connector. Seal the connection through heat-shrink tubing.
Splicing an RG59 Cable
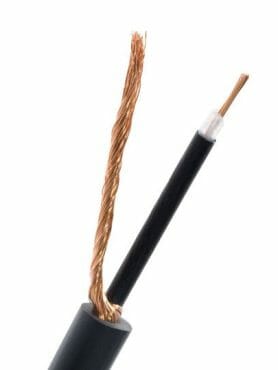
Before splicing an RG59 cable, have important tools like a wrench, pliers, tape, and cutters. Here are the steps for splicing an RG59 Cable.
Measurement and Cutting
Measure the cable precisely and cut away damaged ends. Remove the outer shield through the cutter. Remove the aluminum and insulated shielding. Cut open the white protection layer over the inner copper. Repeat the steps on the other side of the cable.
Matching
In the final step, match the centers of both wires, and surround them with each other. Cover the splice with electrical tape.
Your spliced RG59 cable is ready.
Which One: Splicing Bulk or Pre-Made Cables
Through Pre-made cables, you wouldn’t have to buy the tools required to install them. On the other hand, splicing bulk is cheaper and easier to adjust in walls, but you need some electrical experience for spicing bulk cables.
There are two basic kinds of camera wires. Whether your camera is digital or analog, you must follow a different procedure to splice your wires. Whether your camera wires are Ethernet or any variation of the 3-wire, using the information provided here, you can splice the wires perfectly.
References
(1) digital cameras – https://www.britannica.com/technology/digital-camera
(2) analog cameras – https://www.quora.com/What-is-an-analog-camera-What-is-the-difference-between-an-analog-camera-and-a-digital-camera
(3) internet protocol – https://www.cloudflare.com/learning/network-layer/internet-protocol/