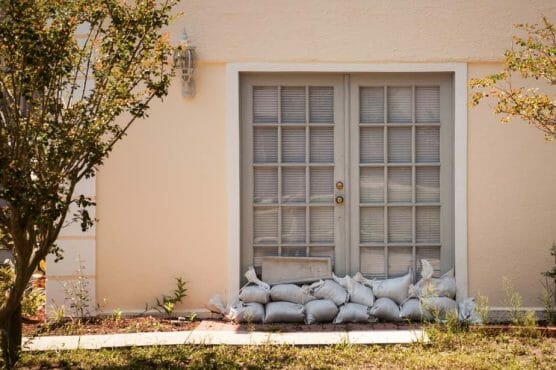
Flooding can be devastating for everyone. Increasing climate change issues have led to natural disasters happening more commonly and at a high cost.
If you live in an area that has experienced floods or is at risk of flooding, you need to prepare as much as possible in advance.
Doors are one of the first lines of defense and the least impermeable part of a property. Door flood barriers come in various forms that are efficient in keeping the water out and the damage to a minimum.
Consider Before Starting
Before making a flood door barrier, you must determine various things, such as whether the door opens in or out. If the door opens in, the flood barriers need to be fit externally, and if it opens out, the flood door barriers are suggested to be placed inside the door.
Similarly, the dimensions of the doors, such as their width and depth and the height of the door from the road, must be assessed before making and fixing it.
Some of the most common types of door flood barriers include:
- Sandbags: These barriers can be placed in front of a door to prevent water from entering a building. They can be made of various materials, such as plastic or rubber, and can be inflated or filled with water to create a barrier.
- Flood Doors: These are specialized doors designed to be watertight and can be installed in place of standard doors to prevent water from entering a building.
- Flood Vents: These are vents installed in the bottom of a door to allow water to flow through, reducing the pressure on the door and preventing it from being pushed open by floodwaters.
- Flood Gates: These are gates that can be installed in front of a door to prevent water from entering a building. They can be made of metal or other durable materials and locked in place to provide added security.
- Automatic Flood Barriers: These are barriers installed in front of a door and automatically activate when water is detected, preventing water from entering the building.
- Water-Resistant Door Seals: These seals can be installed on the door jamb or the door itself to prevent water from seeping through gaps.
We’ll use sandbags as the easiest way to make flood barriers below. These are incredibly cheap, and any bag can be used, such as potato sacks filled with nearby sand.
Making a Flood Barrier From Sandbags
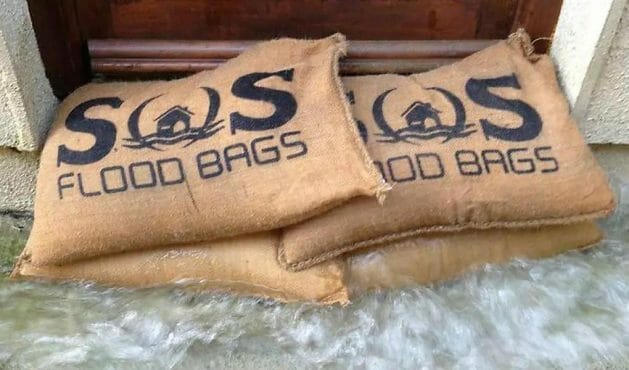
Sandbags are the traditional favorites to use as a door flood barrier. Sandbags are made up of woven hessian, which absorbs moisture and stops water from getting inside. All you need to do is:
- Gather materials: You will need sandbags, sand or soil, and a shovel. If the sandbags are not pre-filled, you will need to fill them with sand or soil.
- Position the bags: Place the sandbags in a line along the base of the door or window you want to protect. Make sure that the bags are tightly packed together and placed in a way that will block water from entering the building.
- Fill the bags: If you use empty sandbags, fill them with sand or soil using a shovel. Make sure the bags are tightly packed, which will help make the barrier more effective.
- Stack the bags: Stack the sandbags on top of each other to create a barrier at least 2-3 bags high. Make sure that the bags are tightly packed together and that there are no gaps between them.
- Secure the barrier: Use a rope or twine to tie the sandbags together or metal clips to secure the bags. This will help to prevent the bags from shifting or falling over during a flood.
- Use multiple layers: To make the barrier more effective, consider using multiple layers of sandbags. This will help create a more resistant barrier to water pressure.
It’s important to note that sandbags are not a permanent solution; they are intended to be temporary. Sandbags will deteriorate over time and may be unable to hold back water after some days. They also need to be placed on a dry surface before the flood. Additionally, it’s important to check the local regulations and guidelines before using sandbags as a flood barrier, as some areas may have specific requirements or
Place sandbags upon each other to prevent floodwater from entering through them. More sandbags can be added to increase floodwater resistance by raising the height of the flood door barrier. Sandbags can create a barrier within 10 to 15 minutes, depending on the bags and requirements.
In addition, you can place sandbags inside the door, but remember, don’t make a pile inside, as it will limit the door opening capacity. Sandbags can be used once they are soaked in water, so place and use them in need instead of testing during the flooding season as it will impact their resisting abilities.
Inflatable Flood bags
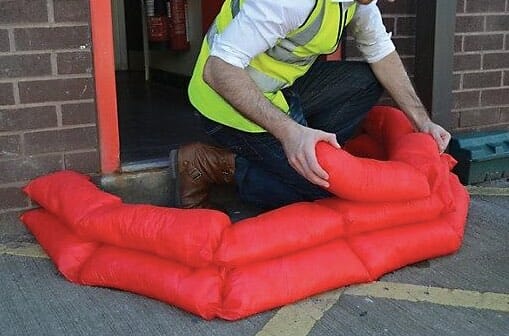
Inflatable flood bags can also be used as a flood door barrier. They are easy to move and store and are more effective in limiting the flood water entering the property. It takes less than 7 minutes to inflate and install inflatable flood bags on the entrants. You can place layers of flood bags to improve their resistance and ability.
This type of flood door barrier enables quick expansion, improving the response to rising floodwater. You can choose the lengths of the bags per your needs by measuring the door width and using specialized air tools or normal air pumps. To increase its efficiency, you can:
- Increase the number of layers vertically
- Increase the number of layers horizontally
By adding vertically, you will be able to increase the height of flood door barriers, and by adding horizontally, the width and resistance will be improved.
Flood Traps
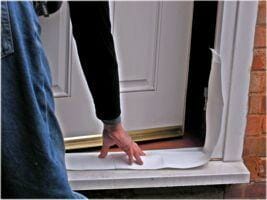
Flood traps can be placed on the corners of the doors to limit the entry of floodwater inside the property. To make the flood door barrier, you must purchase a dry flood trap and fit it dry or inflated. For non-saline surface floods such as rain, you can make layers of the flood trap sheets and place them on the corners of the door; however, to ensure that the sheets are stuck on vertical corners, you might need to wet the sheet slightly. After fitting the dry strips, the flood traps will be automatically activated by the floodwater. (1)
At the same time, for seawater floods, half of the strips must be soaked in tap water to ensure that the salty floodwater does not penetrate. The water activates the water-proof gel on the strips, which must be placed on the outer part of the door, while the dry section needs to be placed on the corner fillers of the doors. Similarly, lay vertical strips on the vertical part of the door frame, and ensure that the corners are filled. The vertical strips can also be strengthened by tapping to ensure no gaps in the door frame.
To improve the strength of the flood door barriers, you can add dry strips inside the door and fix them through tapping to increase the resistance of the flood door barrier from floodwater pressure. The strips can be placed in about 5 minutes, apart from the pre-soaking time, which is additional 5 minutes.
Flood gates
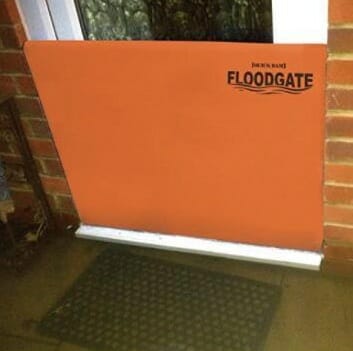
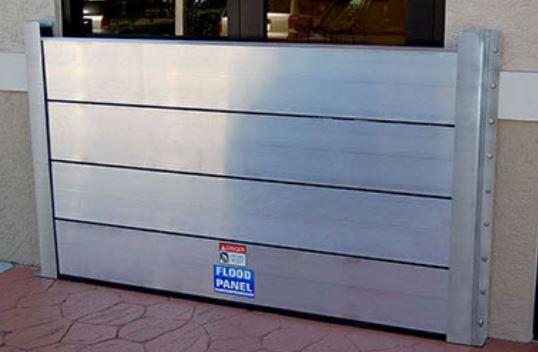
Flood gates can be used as an alternative or permanent fixture to the doors. You can fix the flood gates on your doorframe through adjustable steel clips, while the frame will be fixed per the door’s dimensions. The floodgates include multiple options, such as wood, concrete, or steel. The stoned material of the floodgates protects the property and stops floodwater from entering from the door.
You can also make floodgates by assessing the door frame measurements and making a gate to fit in the doorway. The strength of the floodgate, its height, and its material can be based upon the requirement and level of floods you experience in your area. The flood door can be fixed through clips and bolts that strengthen the barrier’s ability against the flood intensity.
It can be installed in under 5 minutes, making it one of the most reliable flood door barriers. Flood gates protect from floodwater and have flexibility on the sides to meet the door reveal. You can also add inflatable bags or flood traps to improve the seal around your doorway. In addition, it can be made of a hydro shield, aluminum, or HD aluminum that can be added to the bottom of the door to make it a flood door barrier. Different panels of the products can be added to increase the barrier ability and deflect the floodwater away from the home.
Water-Activated Flood Barriers
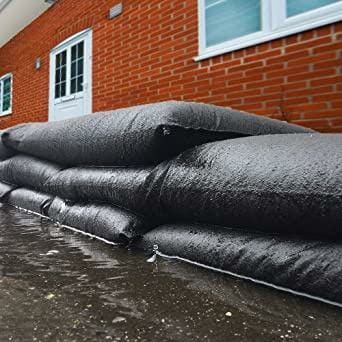
For areas that are at more risk for floods, water-activated flood barriers protect the doorways from flooding. The barrier becomes activated upon contact with water and, within 10 minutes, expands to reach a height of 3.5 inches. You can lay the barrier outside the door, either directly in front of the door or make a formation outside the door.
The polymer, considered a super absorbent, swells when in contact with water and can make a water-activated flood barrier. The more absorbent polymer is used, the more effective the barrier is. Place the barriers based on the door width and depth and at least one barrier behind the first barrier to ensure its resistance.
Utilizing its self-opening method results in time and effort in installing and fitting the barrier. However, water can lift the barrier, so it is necessary to ensure there is weight on the sides so that it does not move from its place. Once the water is absorbed, the barrier pushes the water away from the door.
UPVC flood door
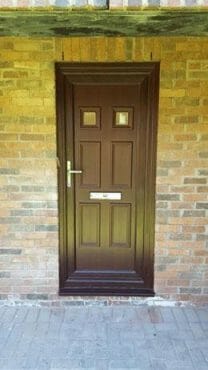
UPVC (Un-plasticised Poly Vinyl Chloride) flood doors are suitable for single and double doors that include many styles. The flood door not only saves you from the flood water entering the property but also improves the aesthetics of your property. It acts as a flood door barrier for areas subjected to lower flooding levels. UPVC flood doors are becoming a popular passive flood defense measure that you can add to your property and make your normal door a flood door. (2)
The resistance ability of the doors can be improved based on the materials chosen, such as aluminum or timber-reinforced foam panels. This flood door barrier does not require additional service or product, reducing your concerns during the flood season.
More Tips to Protect Your Door from Flooding
One of the easiest processes through which gaps can be fixed is through a self-adhesive seal strip. One of the other processes is using a plastic sheet at the bottom side of the door with the help of water-resistant adhesive taps. Better results can be obtained by combining the seal strips with the plastic sheets.
For the gaps that are smaller in size and are less than 1/8 inch, silicone caulk can be used, but one thing that needs to be considered is that silicone caulk cannot be easily removed in comparison to the plastic sheet or the seal tape.
In addition, you can use an absorbent sock on the inside part of the door in case of leakage at the bottom. The absorbent sock can be placed in both situations, having placed flood door barriers or not, as it enhances the barrier’s ability.
Summary
Since floods are becoming more common from a decade phenomenon to a seasonal trend, making flood door barriers will save your items, property, and the cost of repairs. There are multiple options from which you can choose the best-fit solution to save for your property. Doors are typically a house’s weakest spot in terms of water protection. Keeping in mind the landscape, in the situation of flooding, houses are at high risk of water penetration through doors.
Therefore it is considered critical to strengthen them over some time. As discussed earlier, it is quite possible to seal the entrance of the doors from floodwater. To obtain the best outcome, it is recommended that the first two methods should be considered and chosen.
The guide presents easy options to create your door flood barriers. You can always come up with your ideas and share them with everybody if they are successful.
References
(1) non-saline surface floods – https://www.sciencedirect.com/science/article/pii/S0167732218350761
(2) UPVC (Un-plasticised Poly Vinyl Chloride) – https://www.diffen.com/difference/PVC_vs_uPVC

