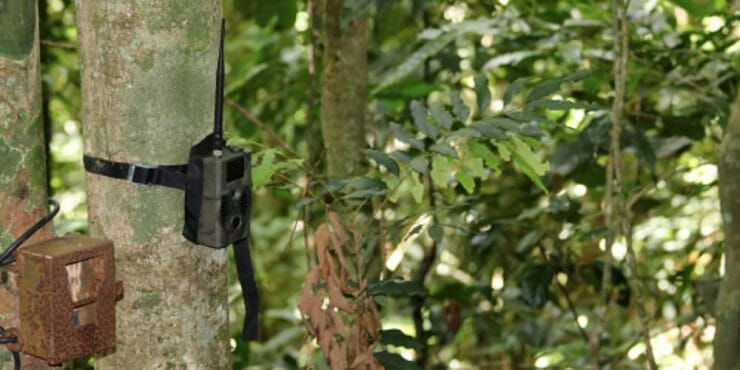
Trail cameras make capturing wildlife photos simple and fun. You can install them in the woods and let them do the work for you without fear of scaring away wildlife. However, even the sturdiest trail cameras could become exposed to several issues through either damage by an animal, theft, or harsh weather conditions.
Thankfully, you can easily protect your trail camera by using a DIY lock box with a few simple steps. If you want to protect your trail camera in the woods but don’t know how to build a security box?
Below, I will cover the steps and instructions for making your security box, well start with:
- Cutting out the space in the tubular steel for the camera
- Building the lock enclosure
- Building the lid and painting the box
Materials Needed
Before you begin the project, I recommend gathering the needed materials.
Here is what you will need:
- Tubular Steel
- Plasma cutter, or anything that could do all the cutting work
- 4 Steel tubes that can be fit over each other (2 need smaller tubes protruding out to slide into the larger ones)
- Chain
- Spray
- Mount
Now that you’ve collected everything you need, you can make the DIY trail camera security box.
Method 1 – Creating Your Own Metal Enclosure With Sheet Metal
1. Get tubular steel for cutting
You can get tubular steel from your local hardware store or online, preferably getting one that measures around 2×6.
2. Cut out an area that the camera, sensor, and IR bulbs will go into
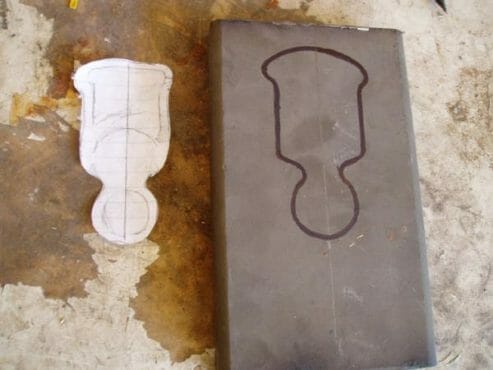
Now that you have the right-sized tubular steel in place, you can cut the section wherein you will put your trail camera.
Measurement and precision are important here, but you can do all the cutting without issue, even with basic hand-man skills. You can use a plasma cutter or any other device that could do the cutting properly if you don’t have a plasma cutter.
A Die grinder is a decent alternative. Make sure you cut a section out for three things; your trail camera, the IR bulbs, and the sensors.
These three components need a clear view of the target to perform their functions well. Use a marker or something similar to measure the trail camera and the other components on the steel.
You could also trace the outline of the camera on a separate piece of paper and mimic the outline on the steel for ease or whatever makes tracing the outline convenient for you.
Once the outline has been drawn, use the cutter to carve the steel neatly. Place the camera inside the cavity and secure it within the box.
3. Build a security box for your trail camera
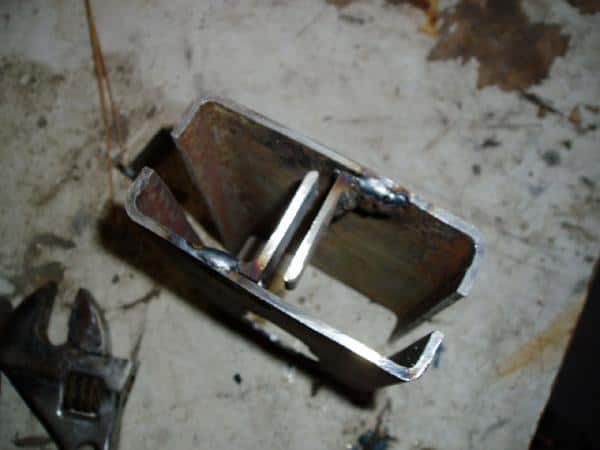
Now that the camera has been neatly placed inside the DIY trail lock box, you must put a securing mechanism in place so that nobody can take it out.
One way to secure the trail camera so nobody can take it is to slide two halves of metal together over the original enclosure.
You need to weld the two pieces of metal so that they can easily slide over each other and off when you need to open the lock box again to retrieve the camera.
4. Put a “Lid” on the thick steel and weld it to the top and bottom
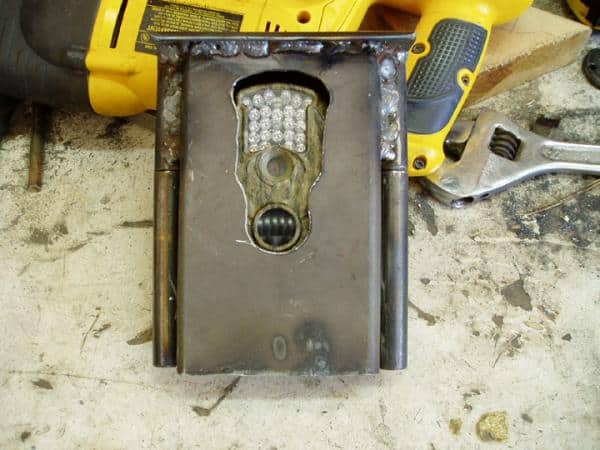
When installing the two pieces, you’d have to do something about the top portion of it is still exposed.
To ensure that nobody can damage the camera from the top, or the rain and other such elements don’t seep into the lock box, you’d have to cover the top portion by making a DIY steel lid, and the same goes for the bottom portion.
For this, you can get a thick piece of steel and weld it on top and bottom of the structure; this won’t affect your ability to open it but will prevent entry from above.
5. Weld “wings” on the backplate to prevent burglars from hack-sawing
You can also add some security to the back, such as installing extra lag bolts and weld wings so the thief cannot capitalize on the box’s weak point from behind, as shown in our image in #6 below.
The purpose of all these security measures is that the burglar isn’t gifted with entry points. With so many measures in place, it would be extremely tough for the burglar to steal the camera from the box.
6. Chain a couple of links and weld the outside case to run a cable through it
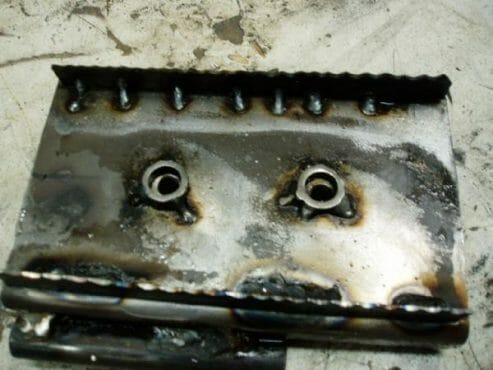
If you’re planning to run some cable in and around the box, you might notice that the present structure would not allow it. You’d have to make a few links to allow the cables to pass through. Welding some chain links to the back would do the trick. (1)
Please ensure the chain links are attached to each piece of the enclosure so that when you run the chains through and over wherever you’re mounting it, this will effectively lock the enclosure and prevent it from being stolen. Otherwise, someone could take the two pieces apart without issue.
7. Finish it off with some spray paint
Once you’re done with all the technical work, you can finish the project by painting the structure. Using acrylic latex semi-gloss is key as it’s a paint specifically designed for metal and will not peel.
8. Mount your trail camera now
Now that the box is ready, you can mount the camera inside and on a tree or any other spot from where you want to watch and capture the photos of your target.
Be mindful of the height of the trail camera; it should be on the same level as the target’s chest, based on your visual estimates.
If it’s too high, it won’t take proper images. If you want it higher, you can put an extra piece of metal on the top or wood to give it a downward angle.
Method 2: Using An Electrical Box
If you don’t want to go through the hassle of the above steps, you can choose a less time-consuming option, although it would be more expensive than the previous method.
For this, you would need to find an electrical box that matches the camera’s height, width, and depth so the camera slides into the box and fits into its new home properly. (2)
Step 1:
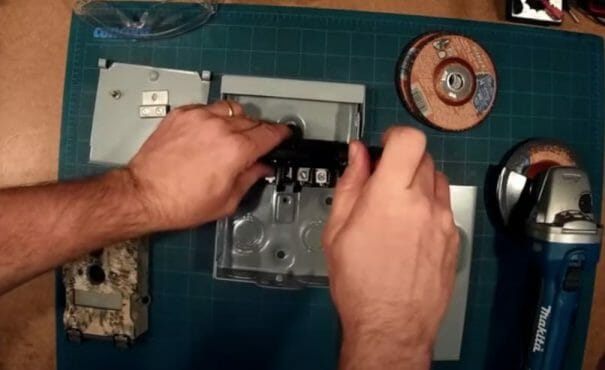
Remove the lid, the electrical box cover, and its internal components. Use the screwdrivers to unscrew the bolts placed to fasten the different components of the electrical box.
Step 2:
Once everything has been removed, place the trail camera inside the box and put the lid back on the front of the camera.
Step 3:
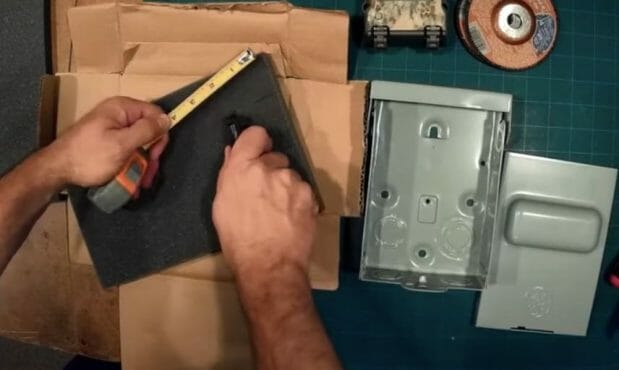
If you think the box is a bit too big for the camera, you can stuff the sides of the camera with foam to prevent the camera from sliding or rattling around in the box. The camera must be aligned with the hole you’ll be carving next.
Take a sheet of foam, take appropriate measurements, and begin cutting the foam. Then, use some glue to stick the foam to the back of the box and let it dry for a while.
Step 4:
Now, you need to make a hole in the front side of the box so the sensors, the IR bulbs, and the camera get a clear view of the target.
You can use a grinder for this purpose. Be careful while using the grinder, and only use it if you have some prior experience.
Once the space for the camera and the sensors have been carved out, sharpen the inside edges.
Step 5:
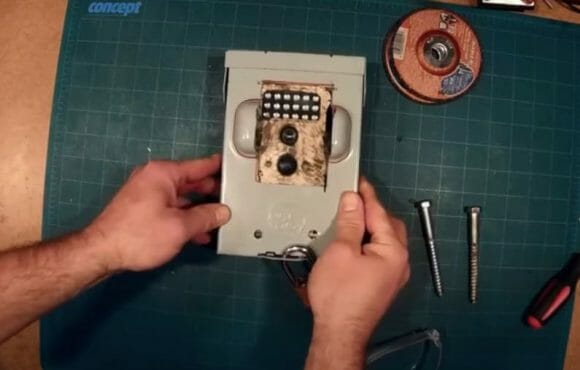
Put the lid back on once the section for the camera has been carved out, and secure the camera with the appropriate padding inside.
In most electrical boxes, you’d find a metal piece at the bottom that could lock the components inside. Get yourself a big lock, or of a size that is good for the size of the electrical box, and lock the trail camera inside so you don’t risk having it stolen by anybody.
Voila, you’re all done! With these two methods, you can make your DIY lock box and secure your trail camera inside. The sturdy exterior will protect the trail camera from animals or the weather, and the proper locking mechanism will protect the camera from theft.
To Buy or To Build? (Advantages & Disadvantages)
You can buy a trail cam box to protect your camera online easily. It would eliminate the need to put a lot of hard work into something you could buy readymade from the market, so why make it? There are many advantages to building a trail cam box instead of buying it.
You’d save a ton of money by creating your camera box. The ones you can buy from a store can be relatively more expensive, but since, for the DIY project, you’d be using items that you can easily find in your garage or toolbox, you can save yourself a lot of money. Your creativity levels could be put to the test too.
Another advantage of creating a trail camera security box yourself is that there is plenty of room for personalization. You won’t have to deal with “one size fits all” because one size DOES NOT fit all. In the DIY project, you can take proper measurements and make a box that neatly fits your trail camera.
| Pros | Cons |
|---|---|
| Customization | Time-Consuming |
| Cost-Effective | Requires Tools and Materials |
| Durability | Lack of Professionalism |
| DIY Personal Satisfaction/Fun | Risk of Damage to Camera |
You may check the video below;
Conclusion
A lockbox is crucial if you want your trail camera to carry out its functions without being damaged or stolen. The question is whether you should build or buy it, as you can also get a readymade lock box from a store. If you want our opinion, then we’d say build it.
The above two mentioned methods outline how you can make a lock box with readily available materials. Even if you don’t have the tools, you can buy them from a store on a shoestring at a price way less than what you’d have to pay for a store-bought security box.
References
(1) Welding – https://www.britannica.com/technology/welding
(2) electrical box – https://www.menards.com/main/buying-guides/electrical-buying-guides/electrical-boxes-buying-guide/c-1459706409557.htm